I'll mainly be trying to explain the context behind these up here, but if you're curious about the design choices behind my icons, I've written a 17 page document (which you can find here) that goes further into that aspect of my HyperFlash stuff. Before I get into what icons are, and their function, though, first I'll need to go into a bit of the background stuff regarding the HyperFlash32. Some of the information in these paragraphs, and how they're structured, will be the same on the labels page.
If a Flash Cart is a game cartridge that allows you to store one game at a time on it to play on your particular console, and a Multicart is a game cartridge that allows you to store many games at the same time, and select them individually through an on-screen menu, then the HyperFlash is somewhere in between. That is to say that like a regular Flash Cart, it can only store one game at a time, but closer to a Multicart, you can select which game to flash via a menu (the ROM files are stored on a micro sd card inserted into the cart); the difference with game selection being that it actually happens on the cart itself.
While this may seem inferior to a traditional Multicart, there is one major difference that gives it a distinct use case, which is that since it has its own screen, the cart can display customised labels depending on the game currently flashed. Since the screen is an e-ink display as well, the HyperFlash32 will retain the image even without power.
This is where the icons come in. Once you've selected a game to flash, the cart will procedurally display a loading bar comprised of 10 duplicated 16x16 pixel black and white images, or icons, as they're officially known. Alternatively, it can load one 16x160 pixel icon (or "long icon", if you will) in ten segments. While I could go into further detail about my involvement with the HyperFlash32, I don't want to flood these pages with too much context, so if you'd like more information on the HyperFlash32, I'll link you to the creator's sites:
Mellott's VR Page
and Retro Onyx.
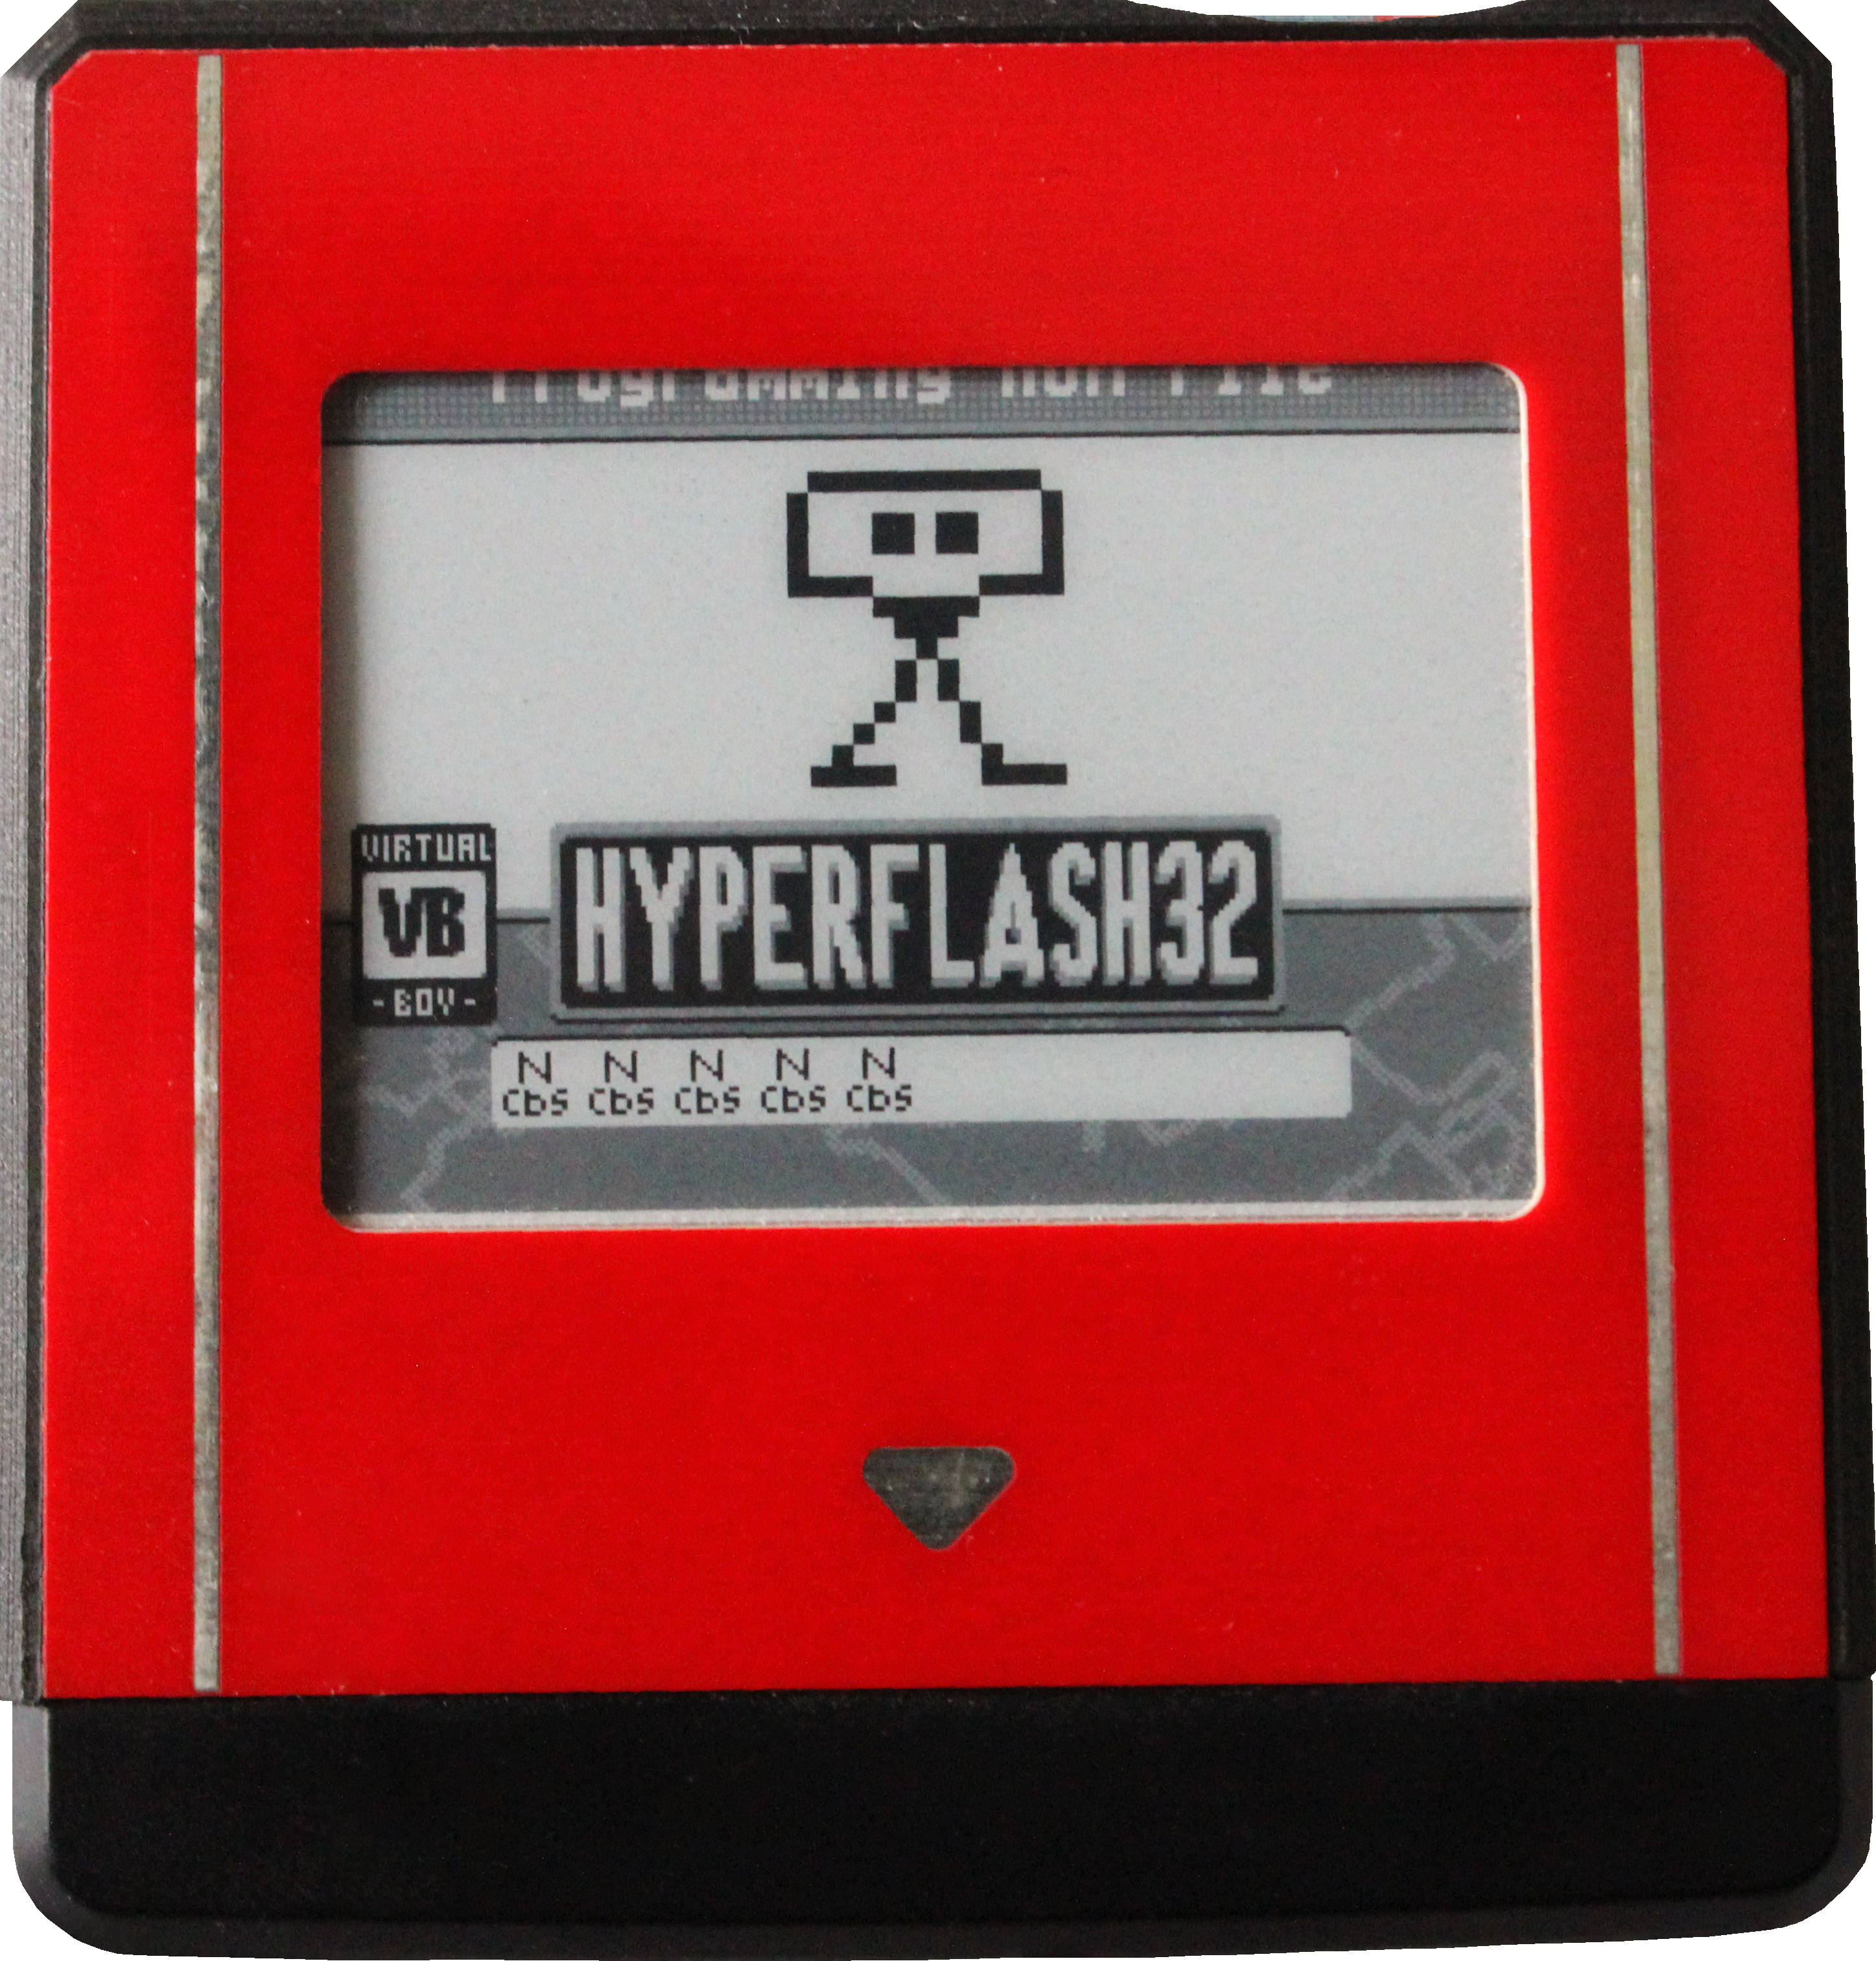
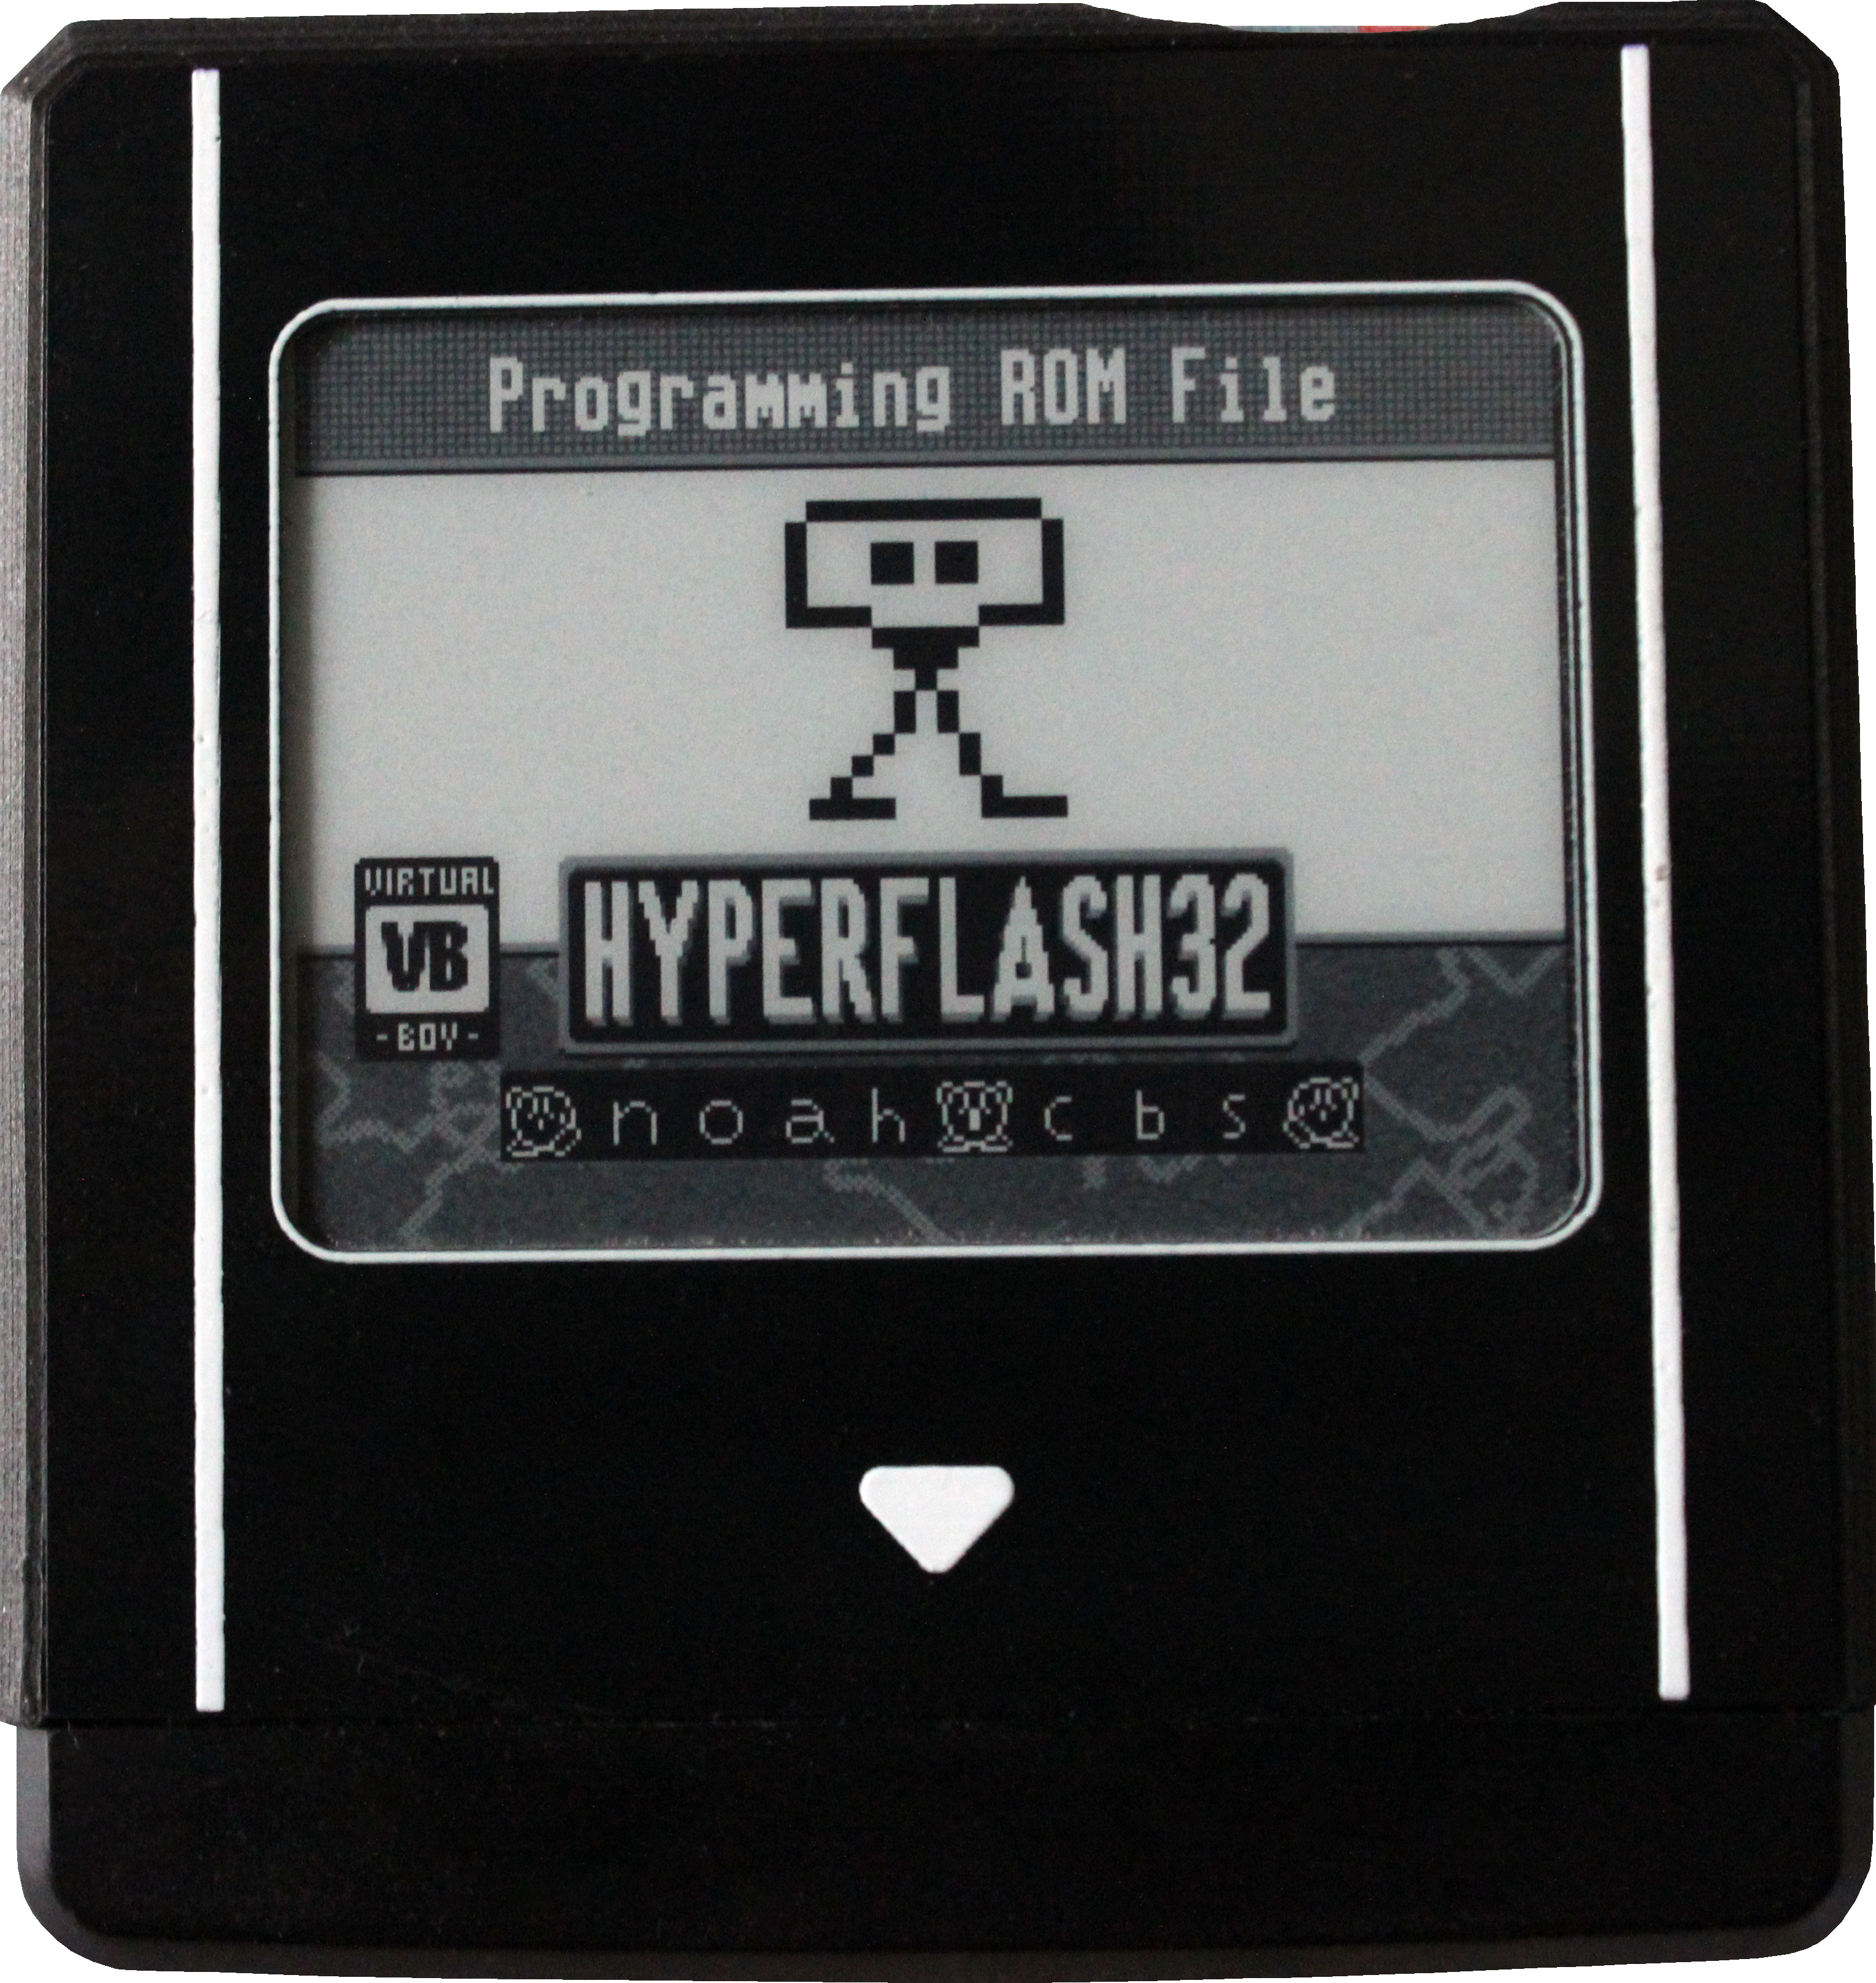
I've included below two pictures of icons on carts to help put it in perspective. The cart on the left is an example of a regular icon as it's flashing, and the one on the right is an example of a long icon once it's been completed. The left cart is the prototype I won from the first HF32 art contest for my Virtual Bowling label (the one in the Preview for the labels page, on the home page; details
here), which is why the display window comes down over the screen and cuts it off a bit. The cart on the right is a production model given to me by Mellott for my work with icons. Finally, below that you can see the icons I've created for the HyperFlash32, and as I stated on the home page, the nav-bar can be used to quickly navigate the page as well.
I touched on them at the top of this page, but long icons were actually a feature introduced a while after the release of the HyperFlash. I was involved in talks with Kevin (Mellott) about them, and before long, he had written the necessary firmware changes to allow the feature and was armed with some icons from me to test as well. While I haven't created as many as I have regular icons, there are still a decent amount to see, and I'd like to make more at some point, too.
![]()
![]()
![]()
![]()
![]()
![]()
![]()
![]()
![]()
![]()
![]()
![]()
![]()
![]()
![]()
![]()
![]()
![]()
![]()
![]()
![]()
![]()
![]()
![]()
![]()
![]()
![]()
![]()
![]()
![]()
![]()
![]()
![]()
![]()
![]()
![]()
![]()
![]()
![]()
![]()
![]()
![]()
![]()
![]()
![]()
![]()
Thanks to GuyPerfect & Clayton for contributing code, and to KR155E for enduring my hosting novitiate. *inserts lame webdev joke about coffee here*
Email: noahcbs@gmail.com or noahcbsbusiness@gmail.com